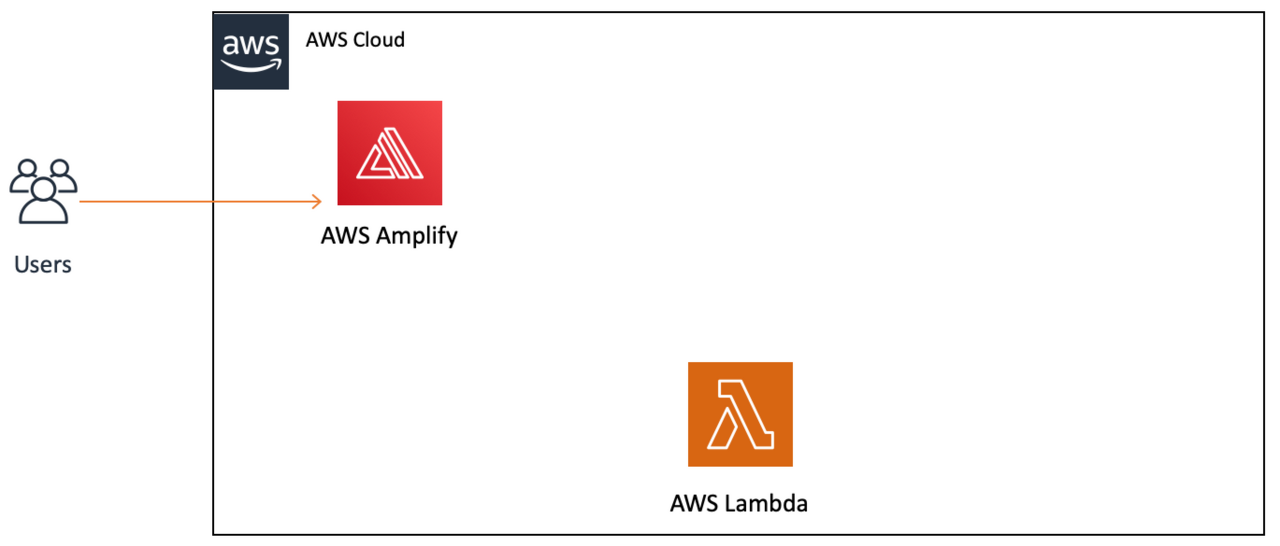
AWS Amplify : 풀스택 웹 및 모바일 앱을 몇 시간 안에 구축할 수 있는 솔루션

VS Code에 html 파일을 만들어서 압축하기
<!DOCTYPE html>
<html lang="en">
<head>
    <meta charset="UTF-8">
    <meta http-equiv="X-UA-Compatible" content="IE=edge">
    <meta name="viewport" content="width=device-width, initial-scale=1.0">
    <title>Hello World</title>
</head>
<body>
    Hello World
</body>
</html>
AWS Amplify 환경에서 새 앱 - 웹 앱 호스팅 - Git 공급자 없이 배포
앱 이름 : AWSWebWorkshop / 환경 이름 : dev
드래그 앤 드롭으로 파일 위에서 압축한 zip 파일 업로드

위의 도메인에 들어가면 다음과 같이 html 파일에 쓴 내용이 나타난다

AWS Lambda : 서버리스 서비스
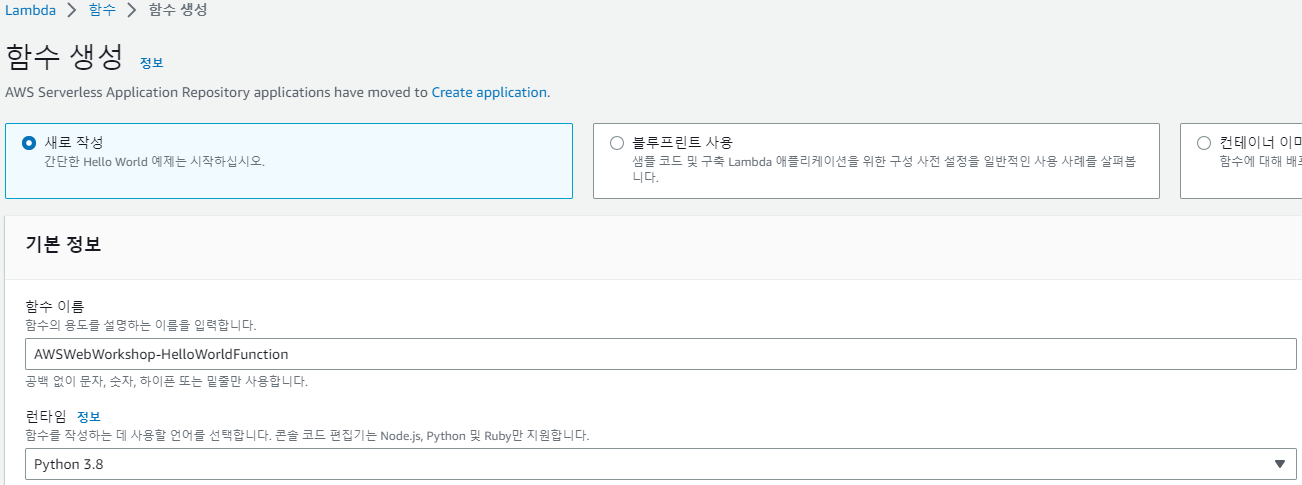
AWS Lambda 콘솔 - 함수 생성
다음 사진의 내용을 작성 - 함수 생성
다음의 파이썬 코드를 작성 - Test 선택
# import the JSON utility package since we will be working with a JSON object
import json
# define the handler function that the Lambda service will use an entry point
def lambda_handler(event, context):
# extract values from the event object we got from the Lambda service
    name = event['firstName'] +' '+ event['lastName']
# return a properly formatted JSON object
    return {
    'statusCode': 200,
    'body': json.dumps('Hello from Lambda, ' + name)
    }
새 이벤트 생성 - 이름 : HelloWorldTestEvent - 나머지는 다음과 같이 작성 - 저장

Deploy - Test 하면 다음과 같이 잘 생성된 것을 확인할 수 있다

Amazon API Gateway : 어떤 규모에서든 개발자가 API를 손쉽게 생성, 게시, 유지 관리, 모니터링 및 보안 유지할 수 있도록 하는 완전관리형 서비스

Amazon API Gateway 콘솔 - API 유형 : REST API(프라이빗 X) 선택
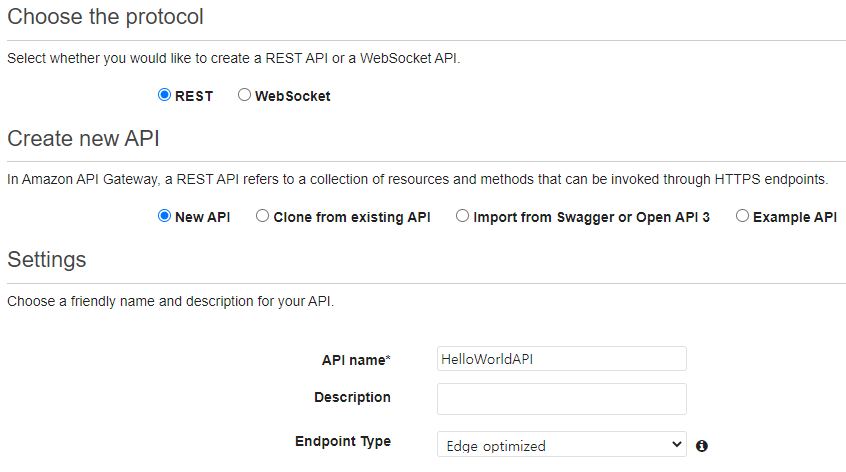
엔드포인트 타입은 3가지가 있다
- Regional API는 현재 지역에 배치되어 있다.
- Edge Optimized API는 CloudFront 네트워크에 배포
- Private API는 VPC에서만 액세스할 수 있습니다.
리소스의 /가 선택된채로 [Actions] - [Create Method] - POST 선택

작업 - Deploy API - 다음과 같이 선택 후 Deploy 하기
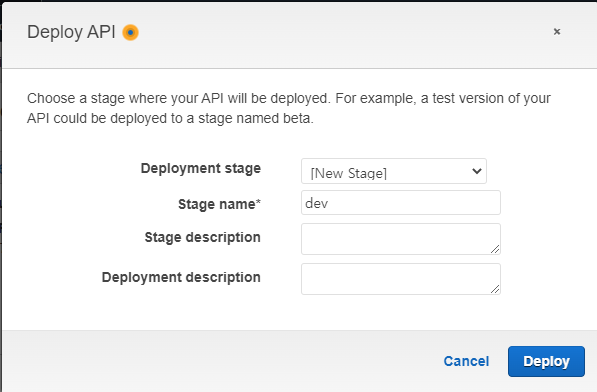
다음과 같이 URL이 나온다
이 URL을 기억하고 있기!

왼쪽 탭의 Resources - POST 선택 - 번개 모양의 Test 선택 - Request Body에 다음 내용 입력
{
    "firstName":"Grace",
    "lastName":"Hopper"
}
아래의 Test 선택하면 다음과 같은 화면이 등장한다
무슨 내용인지는 잘 모르겠는데 잘 테스트 되었다는 의미인듯하다

Amazon DynamoDB : 서버리스 NoSQL 데이터베이스 서비스

DynamoDB 콘솔 - 테이블 생성

Lambda 콘솔 - 이전에 생성한 Lambda 함수 선택 - 구성- 권한 - 실행 역할 - 생성되어 있는 역할 선택
권한 - 권한 추가 - 인라인 정책 생성 선택

다음 정책을 입력한다. Resource 부분에는 방금 생성된 DynamoDB의 ARN을 입력한다
{
"Version": "2012-10-17",
"Statement": [
    {
        "Sid": "VisualEditor0",
        "Effect": "Allow",
        "Action": [
            "dynamodb:PutItem",
            "dynamodb:DeleteItem",
            "dynamodb:GetItem",
            "dynamodb:Scan",
            "dynamodb:Query",
            "dynamodb:UpdateItem"
        ],
        "Resource": "YOUR-TABLE-ARN"
    }
    ]
}
이름을 지정하고 정책 생성을 완료한다
다시 Lambda 콘솔로 가서 이번엔 코드를 다음과 같이 변경한다
# import the json utility package since we will be working with a JSON object
import json
# import the AWS SDK (for Python the package name is boto3)
import boto3
# import two packages to help us with dates and date formatting
from time import gmtime, strftime

# create a DynamoDB object using the AWS SDK
dynamodb = boto3.resource('dynamodb')
# use the DynamoDB object to select our table
table = dynamodb.Table('AWSWebWorkshop-HelloWorldDatabase') #DynamoDB 테이블 이름
# store the current time in a human readable format in a variable
now = strftime("%a, %d %b %Y %H:%M:%S +0000", gmtime())

# define the handler function that the Lambda service will use as an entry point
def lambda_handler(event, context):
# extract values from the event object we got from the Lambda service and store in a variable
    name = event['firstName'] +' '+ event['lastName']
# write name and time to the DynamoDB table using the object we instantiated and save response in a variable
    response = table.put_item(
        Item={
            'ID': name,
            'LatestGreetingTime':now
            })
# return a properly formatted JSON object
    return {
        'statusCode': 200,
        'body': json.dumps('Hello from Lambda, ' + name)
    }
혹시 AccessDenied 문제가 생기면 정책을 다시 한 번 살펴보자... 필자의 경우 왜 갑자기 리전이 시드니로 넘어가서 시드니에서 dynamodb를 만들어버리고,,.. 그걸 정책에 넣고..,,,암튼 그랫다.,.^^;;,,., 리전 확인 꼭 하고, 정책 확인도 꼭 해보자
다음과 같이 결과가 잘 나왔다!

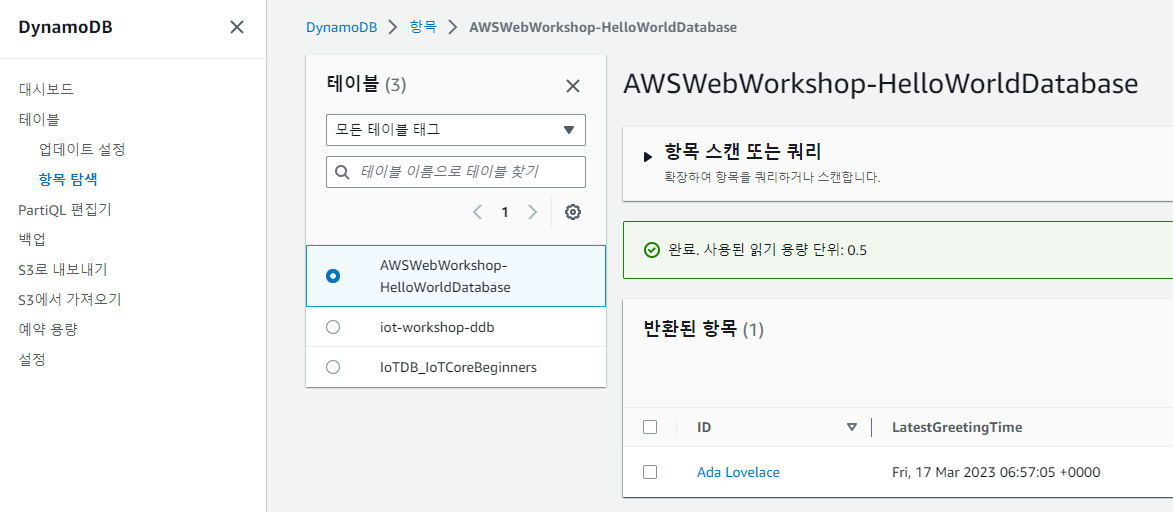
이번엔 DynamoDB의 콘솔로 가서 테이블을 확인해보자
테이블 - 항목 탐색 메뉴로 들어가면 다음과 같이 데이터가 들어가있음을 확인할 수 있다.
이번엔 AWS Amplify 콘솔로 ㄱㄱㄱㄱㄱ
새롭게 index.html 파일을 다음과 같이 수정한다
41번에는 api gateway로 생성된 url을 넣으면 된다
그리고 압축하고, 다시 Amplify에 파일을 업로드한다.
그리고 도메인을 선택하면 다음과 같이 새로운 창이 나온다

근데 그 다음이 안됨;_;
입력하고 Call API 선택하면 Hello from Lambda 하고 이름이 튀어나온다는데 난 안그럼 ㅠ 왜이러냐ㅑㅑㅏㅏㅏㅏㅏ
'AWS > PROJECT' 카테고리의 다른 글
| AWS Site-to-Site VPN 생성하기 (0) | 2023.04.07 |
|---|---|
| AWS Client VPN 설정 및 연결 (0) | 2023.03.24 |
| VPC Peering 연결 (0) | 2023.03.05 |
| AWS CloudFront, S3, ALB, Route53 몽땅 연동하기 (0) | 2023.02.21 |
| EC2 인스턴스가 인터넷 연결이 되지 않을 때... (0) | 2022.12.23 |


